GF Bread cooked in a Dutch Oven

Crispy, Crusty GF Bread in a Dutch Oven – Adventures in Snow Day Baking

GF Bread cooked in a Dutch Oven

A snow day is the perfect time for something that takes a long time to cook. Unfortunately, I got a bit of a late start (shoveling had to be done, after all) so the process of both my slow-cooked corn beef

and for the bread described here were more rushed than I would have liked.

GF Bread — with an actual decent crust!

I got the idea for crusty GF bread from the King Arthur Flour blog.  The essential idea is that you cook bread in a preheated dutch oven.  This keeps in some steam and makes a nice crisp crust on the outside.  I used a standard  no-knead bread recipe and tried to make it GF as I went along, with fairly good results but not what I would describe as complete success.  I don’t usually make bread so not having used the recipe and knowing what it should be doing when it’s not GF made it more of an adventure.

Ingredients:

  • 2 1/2 – 3 cups warm (not hot) water
  • 4 1/2 cups GF “Featherlite” flour mix (this is a mix of lighter flours originally devised by Bette Hagman aka The Gluten Free Gourmet)
  • 1 c. buckwheat
  • 1 c. bean or standard GF baking mix
  • 1 1/2 tbsps active-dry yeast (next time, I’m using 2 tbsps)
  • 1 egg or egg white, beaten throughly, ideally to a froth or peaks
  • 1 tbsp baking powder
  • 1 tbsp salt
  • cornmeal and cooking spray for the pot

Directions

  1. Combine all of the ingredients in a large mixing bowl.  You want warm (not hot) water — think giving a baby a bath, not making tea.  Do not use cold as it has to activate the yeast.  
  2. Stir everything together thoroughly to make a dough. It will be very sticky.  If you have  beater or bread hook you can use that for 30-60 seconds or just mix by hand.
  3. Let the dough rise in a warm spot at room temperature for 2 – 2 1/2 hours. It should get quite big.   
  4. Refrigerate it for at least 2 hours.  Apparently you can leave it at this stage for up to 7 days and it will get tangier, like a sourdough.   I barely had time for the two hours, but next time will leave it longer.
  5. About 1 /2 to 2 hours before you want your bread, prepare a silicon mat, parchment (lightly greased) or floured cloth (cornmeal works well for this).  Plop the dough on it and round it into a ball (at least it’s supposed to be a ball, mine kept sinking flatter.)  You can sift a light coat of GF flour to help keep it moist.  Try to handle it as little as possible to avoid knocking out the air bubbles. 
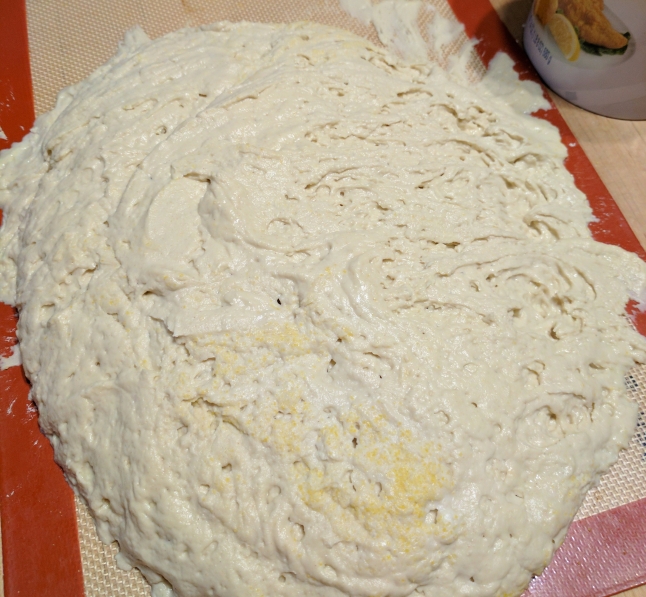
    Bread dough on silicon mat

    As you can see, the bread dough tried to escape the boundaries of its silicon baking mat. It steadfastly refused to create a nice ball.

  6. Let the loaf warm to room temperature and rise again. Keep in mind the temperature of your kitchen will make a difference in how quickly the dough rises. It could take up to 3 hours, but you’ll want a least 90 minutes total.
  7. A half hour to 45 minutes before you want your bread, place a cast-iron dutch oven (including the lid) into to preheat at 450 F.
  8. In 30 minutes, remove the now hot pot from the oven, and lightly coat it with non-stick spray and sprinkle in some cornmeal. (It might smoke a bit so not too much oil.
  9. Turn the risen dough into the pot and shake gently to try to make it settle evenly. You can make a few slashes in the top.  Then place the lid on and slide it into the oven.
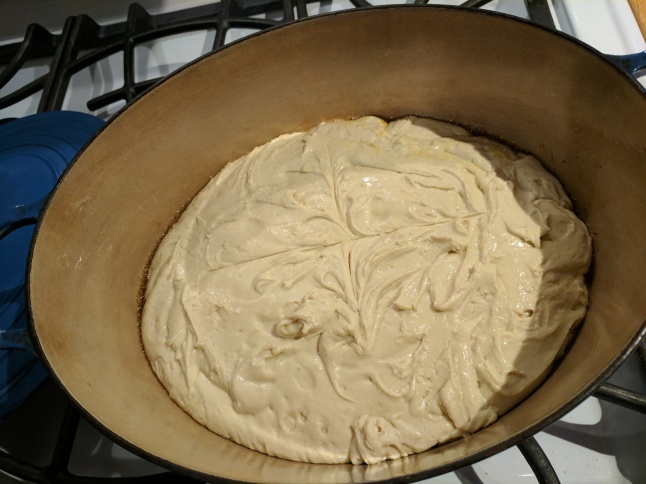
    GF bread dough in the dutch oven.

    Dough – pre baking in the super toasty dutch oven.

  1. Bake for 30 minutes with the lid on, and then remove the lid and cook for another 5 or 10 minutes until the loaf browns up.
  2. Remove the loaf from the oven and let cool as long as you can stand before slicing it to eat.  Let it cool completely on a rack before putting it in a bag or cover it, otherwise the steam will still be coming out and it will make your leftover bread lose its nice crispy crust.

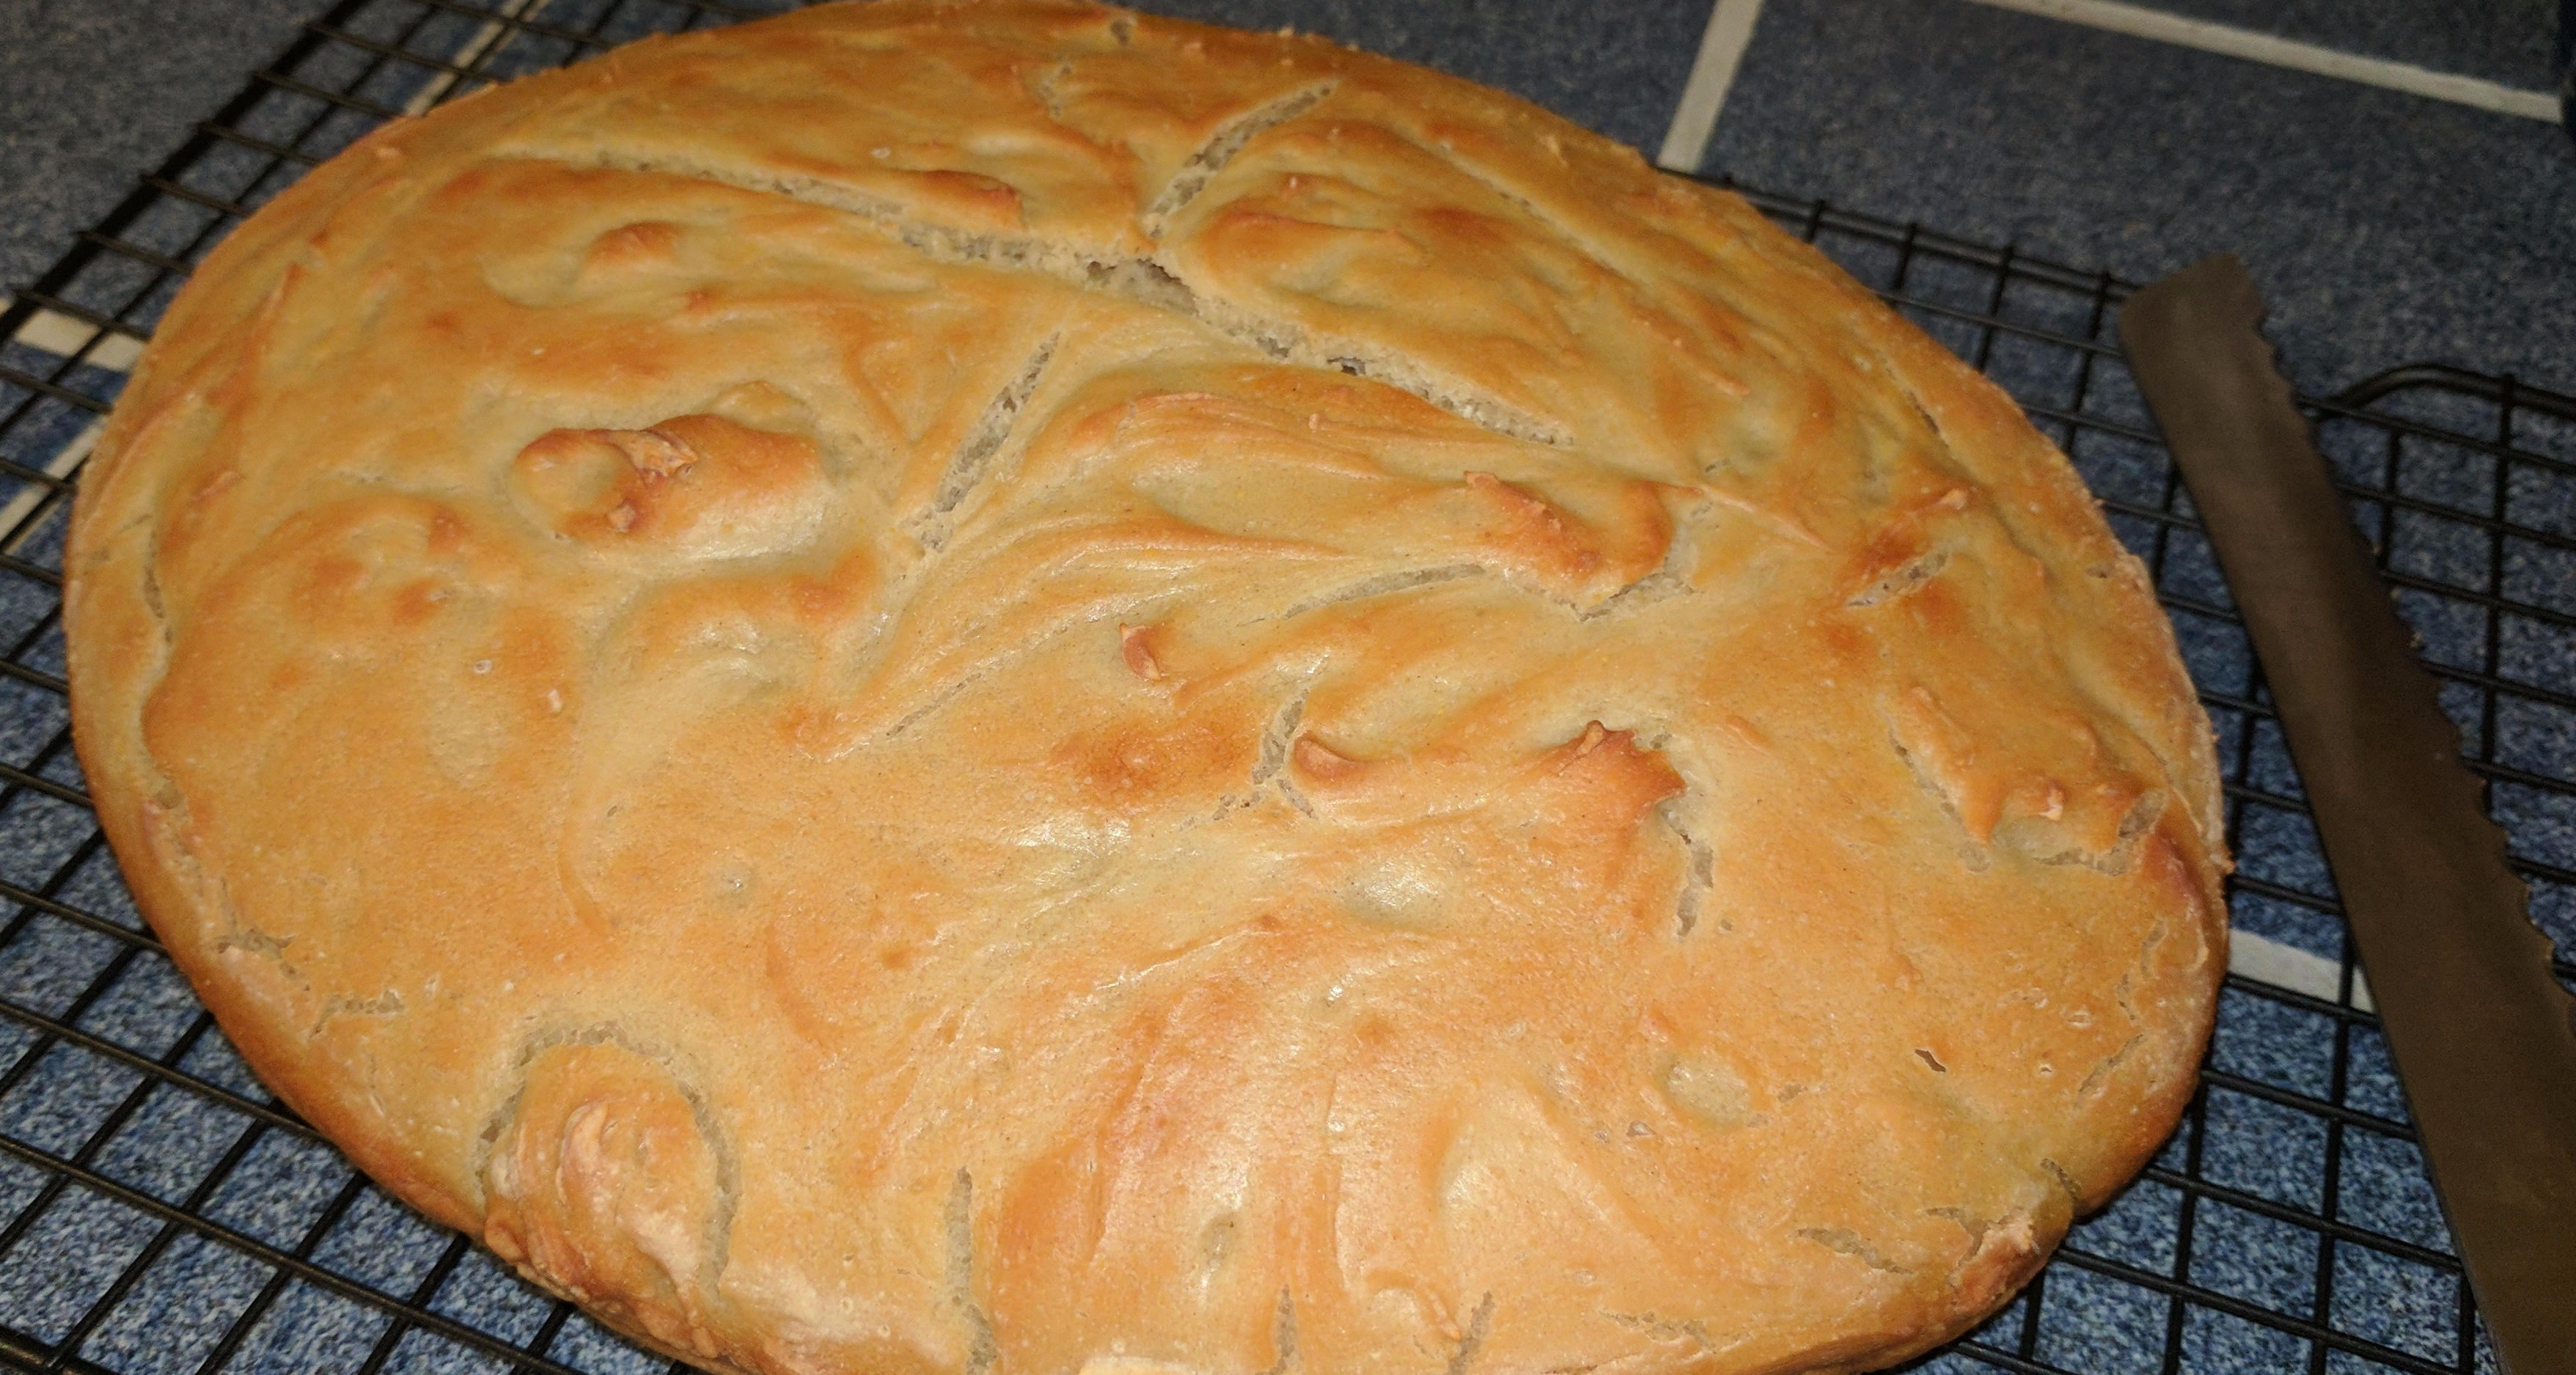
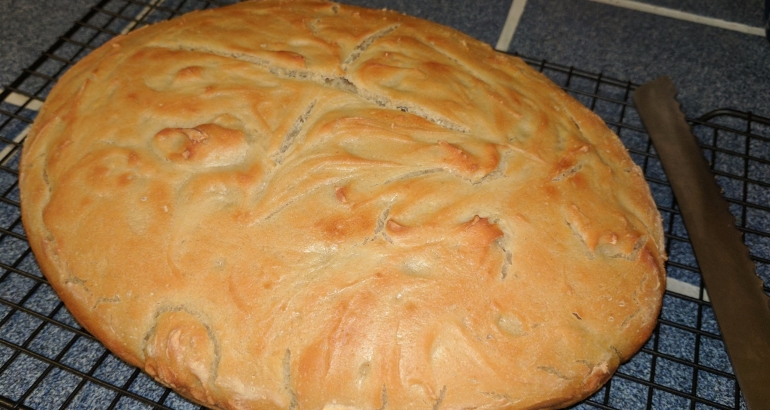
The bread came out with a beautiful, crispy flaky crust, even if it was so flat it looked more like a ciabatta than a boule or loaf.  The texture was quite dense, and not as light as I wanted, but still very flavorful and not soggy. In the words of hubby, this is the first GF bread he has ever had with a crispy crust.

GF Bread cooked in a Dutch OvenLessons learned:

Crispy is good.  That part worked perfectly.  However, the bread needed to rise more, so alterations are in order.  It’s definitely worth trying again. My lessons learned are below.

Next time I will:

  • Use newer and slightly more yeast than the non-GF recipe called for.  (My yeast hadn’t expired but it was only about a week from it.  If there hadn’t been a foot of snow in the driveway, I probably would have gotten some new.)
  • Use only the egg white and see if that makes a difference.
  • Use slightly less liquid — The dough was quite floppy and couldn’t support its own weight, which meant it was too wide and not tall enough.
  • Possibly go with slightly less heavy flour — I’m kind of torn on this. Heavier GF flours (bean, buckwheat, etc. ) tend to have more flavor than lighter ones (starches, white rice).  After all you want bread worth eating when you get done. I might try adding a bit of cornmeal as well.
  • Sift the flour beforehand and see if I can add more air before starting
  • Let it rise for longer, both initially on the counter and especially in the fridge.
  • See if I can find a slightly smaller dutch oven to force a taller loaf.
  • Brush some rosemary oil and garlic over the top for added flavor.
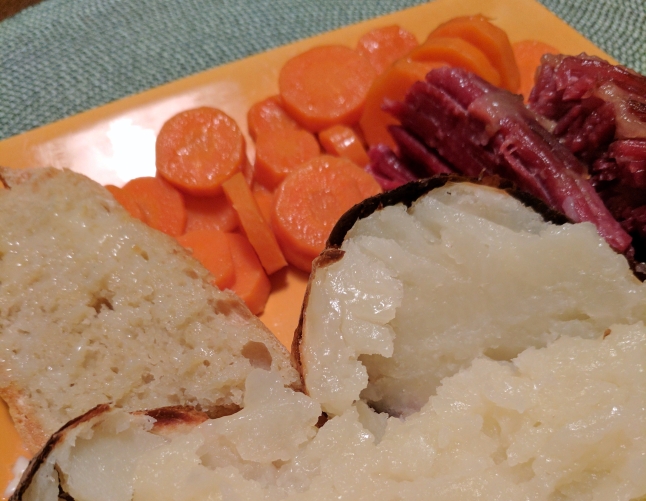
snow day meal

Served with bake potato, corned beef and carrots. Not exactly health food, but very tasty and filling on a cold day



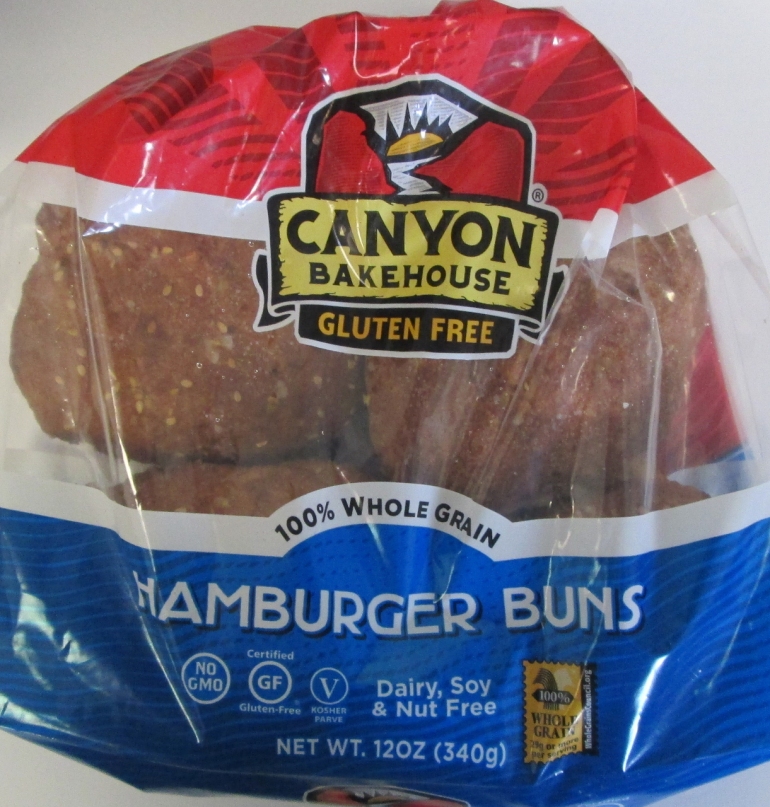
Canyon Bakehouse Hamburger Buns

Canyon Bakehouse Hamburger Buns Review

Canyon Bakehouse Hamburger BunsCanyon Bakehouse Gluten Free Hamburger Buns are a new product at one of my local grocery stores (Stop&Shop/Giant).  You can also buy them direct from Canyon.  Hubby is a big fan of the taste and texture of these over a bunch of other buns we have tried. They are light-brown, unsurprising given that Brown Rice Flour is the top ingredient (also features Tapioca, Sorghum, Millet and Potato), have a texture close to that of wheat bread, and more taste than a lot of gluten-free products.

They are certified GF. They are also dairy, nut and soy free as well, if those are issues for you (but do contain eggs).

The only downside seems to be that they can get a bit squished in the freezing process (or more likely transfer), so it was hard to cut one or two of them and use them for an actual hamburger because the bottom was mangled up.  But a definite thumbs up. They are now a repeat buy.

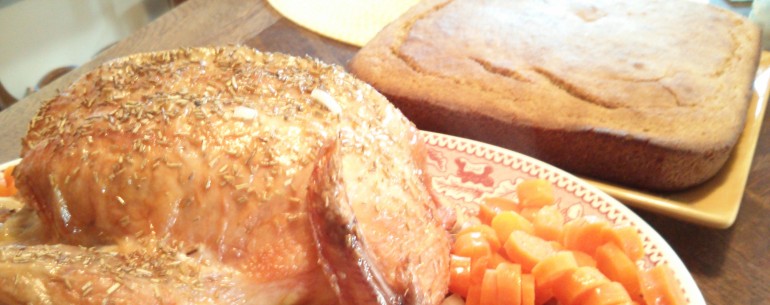
Roast chicken on bed of rice and sausage

Gluten-Free Cornbread

For this cornbread I use a mixture of flours.  For gluten-free baking, it can be difficult to get the right flour mixture.  I do recommend Bob’s Redmill flours. I used Bob’s 1 to 1 mix, plus a little fava bean and some buckwheat (which despite its name contains no wheat and no gluten).

When choosing flours, you can either choose a flour and add xantham or guar gum, which add the stretchy bit that is usually contributed by gluten, or choose a baking mix, which generally includes gum already.  You can skip the xantham gum, which is kind of bitter and smelly, but just be aware that whatever you’re making will be a little more crumbly.  You can address some of this with a bit more liquid or fat, and can more easily get away without it in heavier foods (think pound cake) than lighter ones (think biscuit).

Ingredients

  • 1 cup GF baking mix or flour
  • 1 cup yellow cornmeal
  • 1/4 cup sugar
  • 1 tbsp baking powder
  • 1/2 tsp salt
  • 1/4 cup vegetable oil
  • 1 tbsp butter, melted
  • 1 egg, beaten until fluffy (you can also use 2 egg whites)

Preheat oven to 400 degrees F. (205 C)

Grease and flour a 8×8 or 9×9 inch glass pan.  If you like you can add a piece of waxed paper, which makes removal a lot easier.

Mix dry ingredients. Stir in the milk, eggs, oil and butter, until just moistened.  Pour into pan.  Bake 20-25 minutes until lightly browned on top, it springs back when lightly touched and a toothpick inserted in the center comes out clean.

Gluten-Free Sausage Stuffing

Thanksgiving is my absolute favorite holiday, bar none.  I love it.  No overblown gifts and cards to buy. No nauseating sentiment.  Just feasting with family and friends, and taking time to be grateful that we can give thanks. 

Plus you get the Macy’s parade, which I absolutely adore despite its goofiness.

I also adore Thanksgiving food.  I was born and raised in New England so my family celebrates a very traditional turkey feast with mashed potatoes, gravy, stuffing, carrots, peas, onions, turnip, parsnips, squash, cranberry sauce, yeast rolls and a few other things I’m likely forgetting. 

Then there’s pie.  Pumpkin and Apple, of course, (with real whipped cream and vanilla ice cream), but we also often get chocolate (not so traditional), pecan, cheesecake and host of other things such as Indian pudding (a custardy mix of pumpkin, corn meal, raisins and molasses).  Lastly there is the rather odd concoction of pineapples,whipped cream, and pistachio jello mix made by my grandmother (still! at 96!) It’s commonly known as ‘that green stuff.’  It tastes a LOT better than that sounds, really.

I probably consume about 3000 calories, easy.  But I don’t care.  It’s totally worth it. 

Added to this  childhood feast is an additional stuffing recipe invented by my husband and here converted from life pre-gluten-free.  This has been a favorite for the better part of 15 years, and Hubby really missed it, as did our friends.  Believe me, this is a crowd pleaser.  You will never know it’s GF and neither will any of your guests.  They will still gobble it down.  How do I know this? 

It’s been road tested at both family Thanksgivings, where there is usually barely any crumbs left, along with multiple times at our holiday Thanksgiving with friends, with similar results.  Among these friends are some of the pickiest eaters known to man, so believe me, if they eat it, it’s good.  Part of our secret is we don’t bother to tell people it’s gluten-free, and no one can tell the difference. 

  • 1 1/4 loaves of gluten-bread (We use Food For Life Brown Rice Bread, which is the best sandwich-toasting bread.  Note that it’s denser than your average wheat bread).
  • 1 package (six short links) hot Italian sausage
  • 2-3 ribs of celery and leaves, chopped
  • 1 medium onion, chopped
  • 4-6 cloves of garlic, chopped or pressed
  • 4-6 oz of mushrooms, chopped
  • 3-4 tablespoons olive oil
  • 1-2 tbsps poultry seasoning
  • 2 tsps rosemary
  • 2 tsps thyme
  • 1/4 cup fresh parsley, chopped
  • 1 16 oz package chicken broth, low sodium, if possible

Cut up the gluten-free bread into small cubes about 1/4 to 1/3rd of an inch.  Toss with herbs and a tablespoon or so of oil.  Keep the crumbs and toast them too! Spread the bread cubes and crumbs out on a cookie sheet and toast for 10 to 15 minutes to dry out the bread slightly and crisp it up.  You can do this step a day or two in advance, if you want. 

While the bread is toasting, cook the sausage.  Remove the skin and crumble or chop in 1/3 inch cubes. 

Saute the vegetables and remaining spices in olive oil until soft, the onions are translucent, and the mushrooms are reduced. 

In a large bowl, mix the cubes and the chicken broth to re-hydrate the cubes.  Don’t dump it all in at once.  Depending on how big your loaf is, you may want a little more or less.  Also, if you want a slightly lighter mix, you can use some water instead.  Fold in the sausage and the vegetables (which will add some moisture).  If desired, put in more spices to taste.

You can use the stuffing inside the turkey or cook in a pan on the side (in which case it officially becomes dressing, although I never call it anything except stuffing).  For the latter, cover with foil for to keep the pan from drying out too much. About 15 minutes before you take it out of the oven, remove the foil.

Cook in a 325 F degree oven for an hour.  We usually cook it alongside with the turkey.  Enjoy.  This stuff is fab.

The Great Sub Roll Hunt

One of the things the hubby misses most is a good cheesesteak (He hails from Philly, the home of said delicacy — aka a steak and cheese sub).  While most other types of bread have now been duplicated for GF — sub rolls are not one of those things.  So I have been blundering about looking for a substitute.  I decided to try Gluten Free Pantry french bread and pizza mix.  I didn’t really expect it to have the texture of French bread, since that’s almost impossible to achieve at home even with gluten, but I thought it might achieve the fallback position of making a decent sub roll.  I used the oven method, but did not put it in a standard bread pan as I wanted the roll shape.  The dough is quite sticky, so you will need to use extra GF flour in order to shape it.   I divided into two loaves.  However, the dough didn’t rise all that much, and in the oven flattened out even more, so one of the loaves better resembled a cibatta than a french loaf.  The directions called for mixing with a mixer for 2 minutes, which may have something to do with the lack of rising. 

On the whole, it tasted pretty good, although not that much like French Bread, rather more like pizza dough.  The texture was neither French bread nor a sub roll but more like a rather thick biscuit.  We still enjoyed our cheesesteaks.  And on the plus side it doesn’t have that xanthan gum bitter taste to it.  

After meal life:  The bread was pretty filling, and I couldn’t finish my cheesesteak, so I tucked it in the fridge for the next day.  I couldn’t eat it, though, as the bread was roughly the consistency of lead.  So if you make the bread, put any leftovers in the freezer promptly. 

We had put the other loaf in the freezer, and took out one of the pieces two days later to cut up to make croutons.  Those were excellent — a little olive oil and butter and some spices.  Scrumptious. 

Overall rating:  4 out of 5. 

Brief Comments:  Not really French bread, but still fairly tasty.  You must immediately freeze the leftovers.