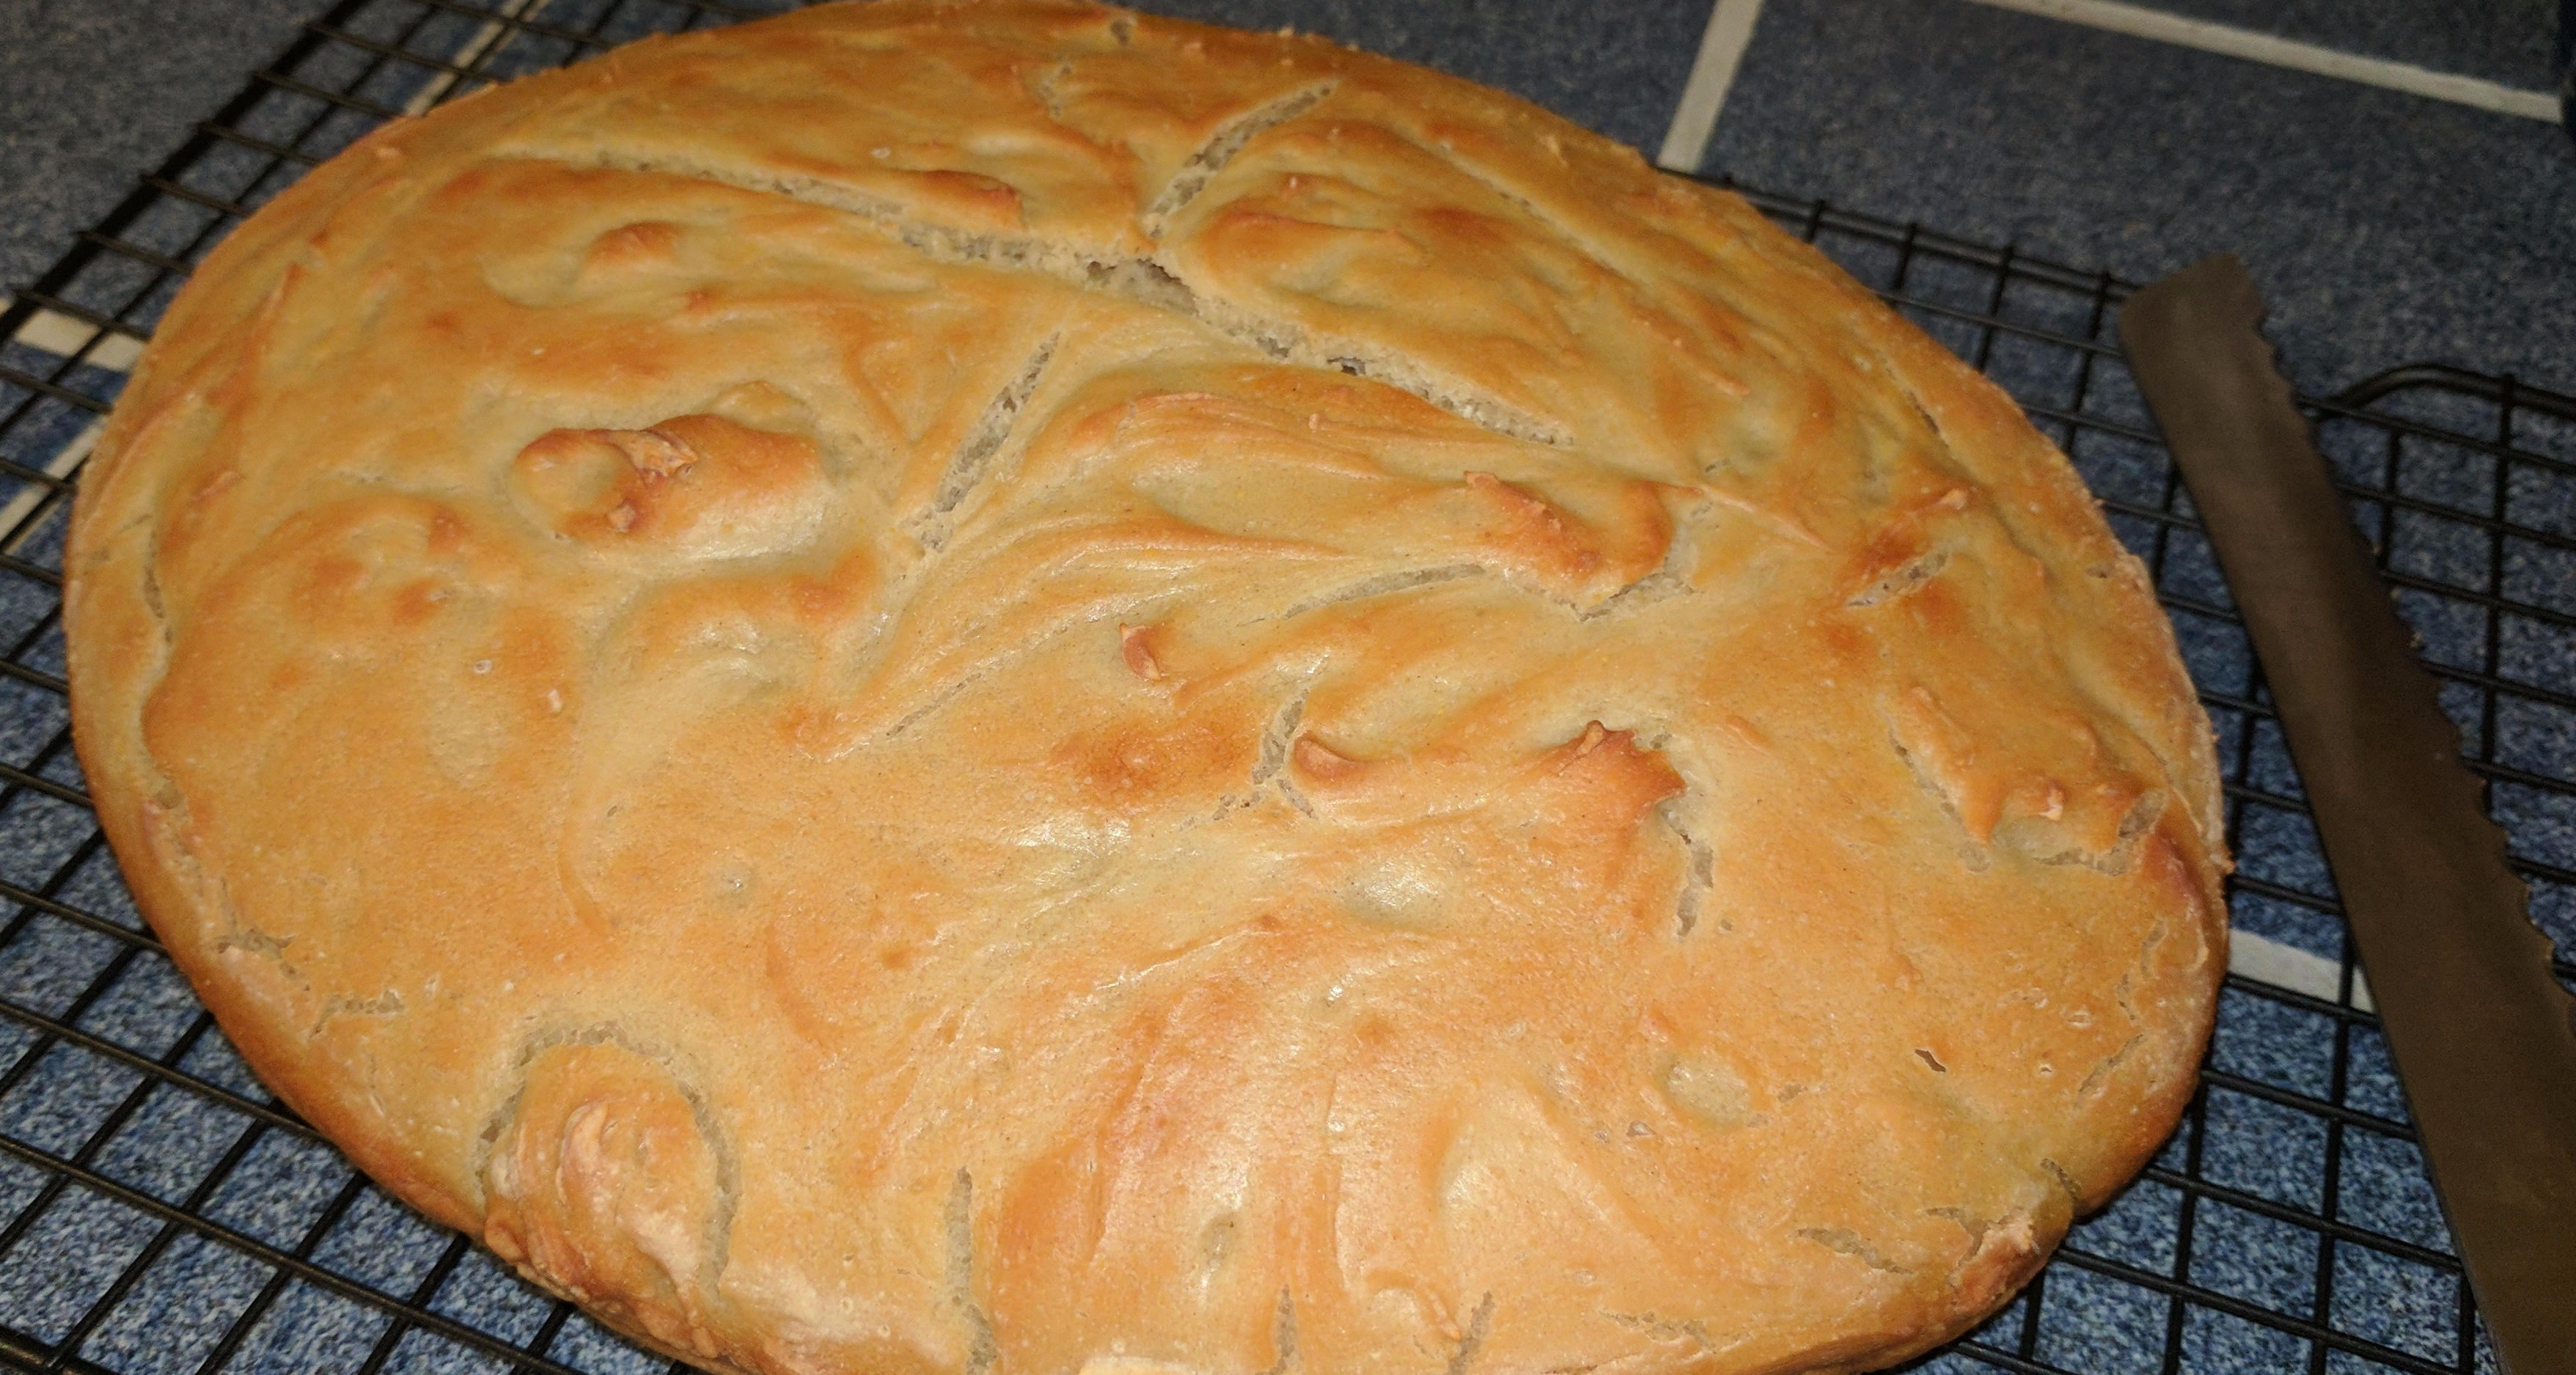
GF Bread cooked in a Dutch Oven

Crispy, Crusty GF Bread in a Dutch Oven – Adventures in Snow Day Baking

GF Bread cooked in a Dutch Oven

A snow day is the perfect time for something that takes a long time to cook. Unfortunately, I got a bit of a late start (shoveling had to be done, after all) so the process of both my slow-cooked corn beef

and for the bread described here were more rushed than I would have liked.

GF Bread — with an actual decent crust!

I got the idea for crusty GF bread from the King Arthur Flour blog.  The essential idea is that you cook bread in a preheated dutch oven.  This keeps in some steam and makes a nice crisp crust on the outside.  I used a standard  no-knead bread recipe and tried to make it GF as I went along, with fairly good results but not what I would describe as complete success.  I don’t usually make bread so not having used the recipe and knowing what it should be doing when it’s not GF made it more of an adventure.

Ingredients:

  • 2 1/2 – 3 cups warm (not hot) water
  • 4 1/2 cups GF “Featherlite” flour mix (this is a mix of lighter flours originally devised by Bette Hagman aka The Gluten Free Gourmet)
  • 1 c. buckwheat
  • 1 c. bean or standard GF baking mix
  • 1 1/2 tbsps active-dry yeast (next time, I’m using 2 tbsps)
  • 1 egg or egg white, beaten throughly, ideally to a froth or peaks
  • 1 tbsp baking powder
  • 1 tbsp salt
  • cornmeal and cooking spray for the pot

Directions

  1. Combine all of the ingredients in a large mixing bowl.  You want warm (not hot) water — think giving a baby a bath, not making tea.  Do not use cold as it has to activate the yeast.  
  2. Stir everything together thoroughly to make a dough. It will be very sticky.  If you have  beater or bread hook you can use that for 30-60 seconds or just mix by hand.
  3. Let the dough rise in a warm spot at room temperature for 2 – 2 1/2 hours. It should get quite big.   
  4. Refrigerate it for at least 2 hours.  Apparently you can leave it at this stage for up to 7 days and it will get tangier, like a sourdough.   I barely had time for the two hours, but next time will leave it longer.
  5. About 1 /2 to 2 hours before you want your bread, prepare a silicon mat, parchment (lightly greased) or floured cloth (cornmeal works well for this).  Plop the dough on it and round it into a ball (at least it’s supposed to be a ball, mine kept sinking flatter.)  You can sift a light coat of GF flour to help keep it moist.  Try to handle it as little as possible to avoid knocking out the air bubbles. 
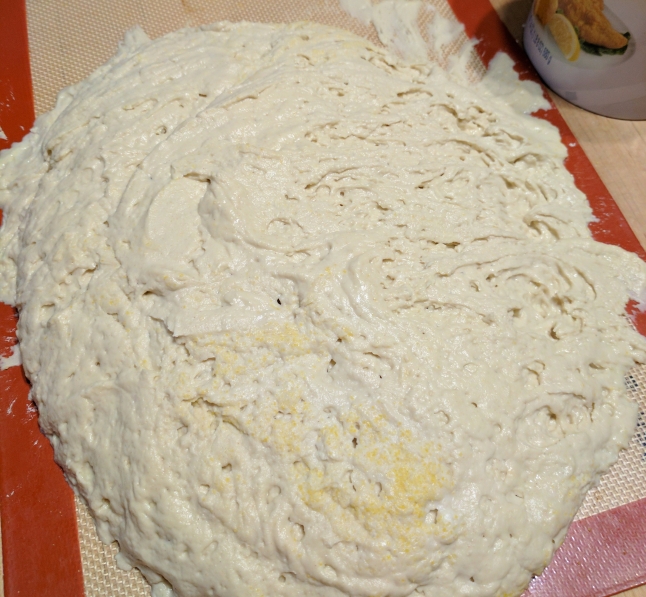
    Bread dough on silicon mat

    As you can see, the bread dough tried to escape the boundaries of its silicon baking mat. It steadfastly refused to create a nice ball.

  6. Let the loaf warm to room temperature and rise again. Keep in mind the temperature of your kitchen will make a difference in how quickly the dough rises. It could take up to 3 hours, but you’ll want a least 90 minutes total.
  7. A half hour to 45 minutes before you want your bread, place a cast-iron dutch oven (including the lid) into to preheat at 450 F.
  8. In 30 minutes, remove the now hot pot from the oven, and lightly coat it with non-stick spray and sprinkle in some cornmeal. (It might smoke a bit so not too much oil.
  9. Turn the risen dough into the pot and shake gently to try to make it settle evenly. You can make a few slashes in the top.  Then place the lid on and slide it into the oven.
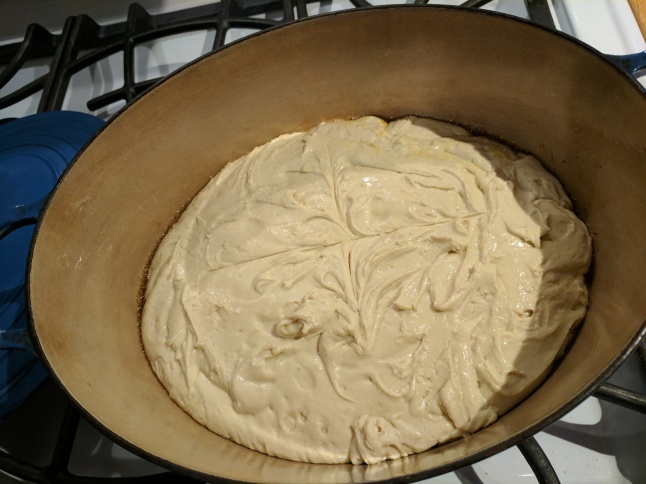
    GF bread dough in the dutch oven.

    Dough – pre baking in the super toasty dutch oven.

  1. Bake for 30 minutes with the lid on, and then remove the lid and cook for another 5 or 10 minutes until the loaf browns up.
  2. Remove the loaf from the oven and let cool as long as you can stand before slicing it to eat.  Let it cool completely on a rack before putting it in a bag or cover it, otherwise the steam will still be coming out and it will make your leftover bread lose its nice crispy crust.

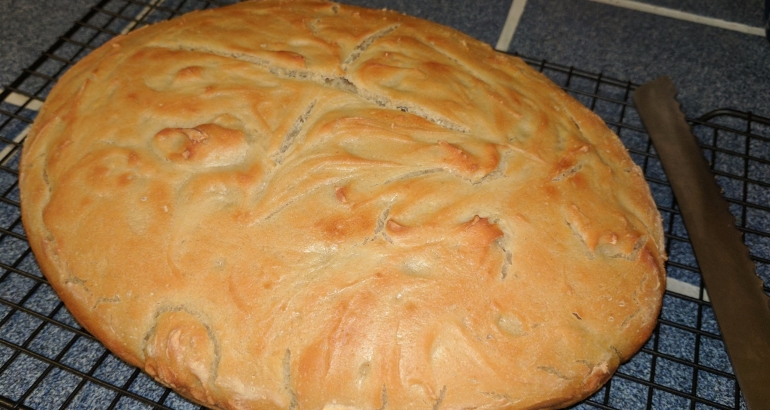
The bread came out with a beautiful, crispy flaky crust, even if it was so flat it looked more like a ciabatta than a boule or loaf.  The texture was quite dense, and not as light as I wanted, but still very flavorful and not soggy. In the words of hubby, this is the first GF bread he has ever had with a crispy crust.

GF Bread cooked in a Dutch OvenLessons learned:

Crispy is good.  That part worked perfectly.  However, the bread needed to rise more, so alterations are in order.  It’s definitely worth trying again. My lessons learned are below.

Next time I will:

  • Use newer and slightly more yeast than the non-GF recipe called for.  (My yeast hadn’t expired but it was only about a week from it.  If there hadn’t been a foot of snow in the driveway, I probably would have gotten some new.)
  • Use only the egg white and see if that makes a difference.
  • Use slightly less liquid — The dough was quite floppy and couldn’t support its own weight, which meant it was too wide and not tall enough.
  • Possibly go with slightly less heavy flour — I’m kind of torn on this. Heavier GF flours (bean, buckwheat, etc. ) tend to have more flavor than lighter ones (starches, white rice).  After all you want bread worth eating when you get done. I might try adding a bit of cornmeal as well.
  • Sift the flour beforehand and see if I can add more air before starting
  • Let it rise for longer, both initially on the counter and especially in the fridge.
  • See if I can find a slightly smaller dutch oven to force a taller loaf.
  • Brush some rosemary oil and garlic over the top for added flavor.
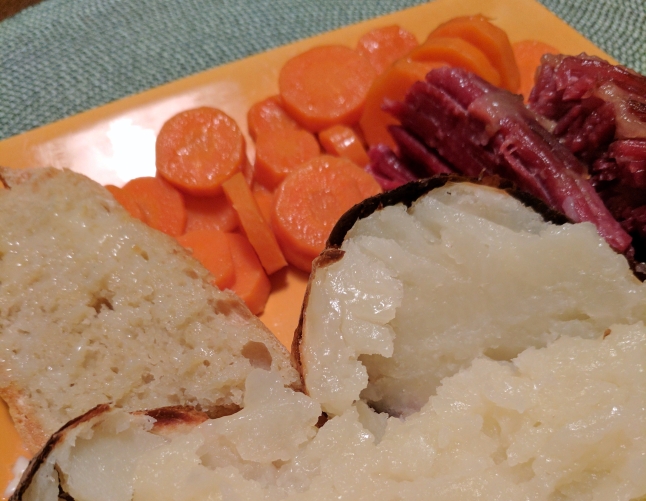
snow day meal

Served with bake potato, corned beef and carrots. Not exactly health food, but very tasty and filling on a cold day



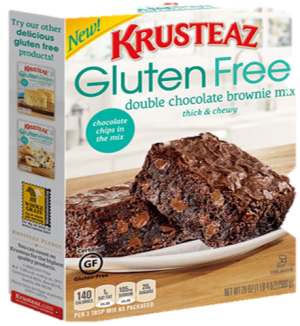
Krusteaz Gluten Free Double Chocolate Brownie Mix

Thumbs up on this one.Box of Krusteaz Gluten Free double chocolate brownie mix This mix was new at my local grocery so I thought I would give it a try.  The brownies pass the ultimate GF test, which is you can’t tell that they are gluten free.  Moist dense, and chocolaty, with the added chocolate chip bursts.
You just need to add add oil, an egg and water, so they whip up fast.  I do recommend whisking the egg before adding the water and oil and then again before the mix.  The more air you whip into eggs in any GF recipe helps them rise better.

Because they recommended the 8×8 pan rather than a 9 x 13, the brownies are fairly tall, and take a while to cook.  But they’re worth it.

Image

Colorful Kaleidoscope Carrots

IMG_20151029_172233Cut Up Kaleidoscope carrotscleaned kaleidoscope carrotsAs you might know, Boston had its snowiest winter ever recorded this year.  (The pile of snow removed from the streets in the South Boston “snow farm” did not melt until after Bastille Day in July!).  That meant I was absolutely desperate to see some sign of spring and was thrilled at the chance to go to the Boston Flower Show in March.  It was like heaven on earth.  Green things! Food for the soul.

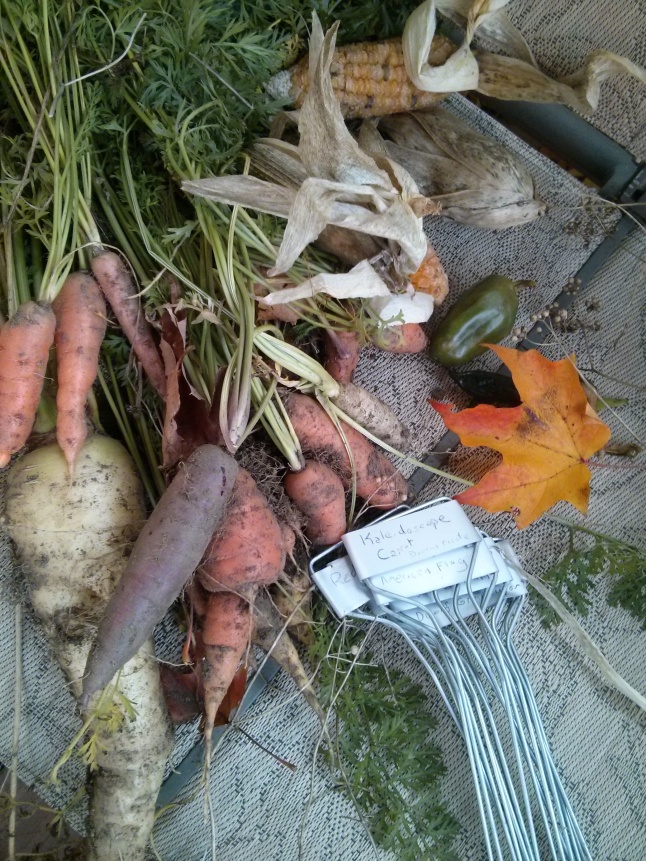
One of the booths was Hudson Valley Seed Company, which sells seeds for heirloom variety vegetables.  One of the things I fell for was an art pack of Kaleidoscope Carrots – carrots in a rainbow of colors – purple, yellow, red and white, along with well, carrot orange.kaleidoscope_done_1 Oh, the ambitions one has for the garden while it is still winter.
We planted them in our expanded garden in late May when it was finally safe. They have a 75-day growing season so we should have been able to harvest them in mid to late August, but the few we pulled up (despite their giant green tops) were tiny, so we left them in the ground longer.  We finally harvested them for a dinner party this week. We pretty much had to since we were digging up the garden for the winter. Sadly, with only a few exceptions, they still did not look like the beautiful ideal we hoped for.

Kaleidoscope-carrot-ideal

The kaleidoscope ideal. Sigh.

(One of the farmers at our local market said this was likely the result of not enough nitrogen and we need to fertilize better next year.) His vegetables are gorgeous so he ought to know.  That and i think we didn’t thin them properly.

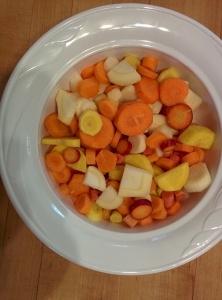
None the less they still had gorgeous color, and they tasted lovely – very mellow compared to store-bought carrots. We steamed them in the microwave until crisp-tender and just added a little bit of butter.  Our friends thought they were beautiful – a feast for the eyes and the tummy.

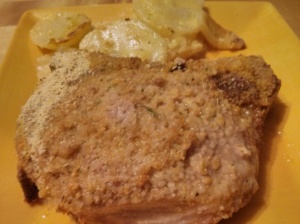
Gluten-Free Au gratin potatoes with pork chop

Au Gratin Potatoes (GF)

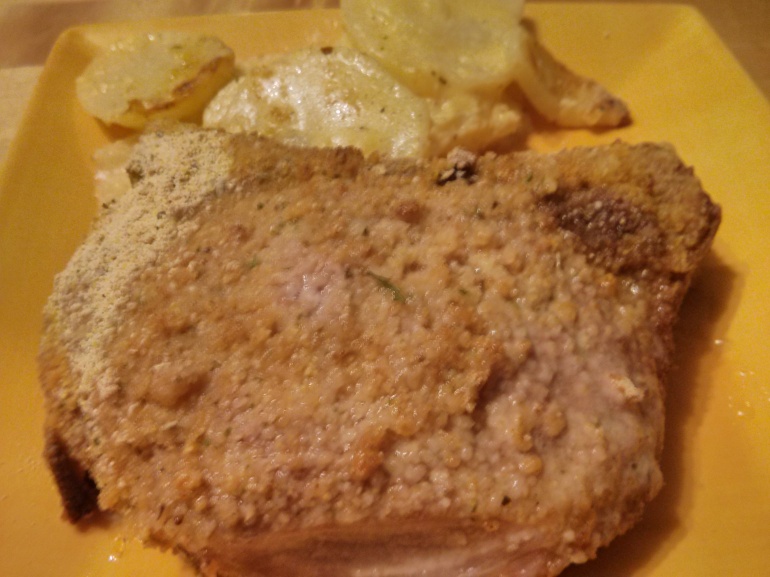
The base of AGluten-Free Au gratin potatoes with pork chopu Gratin potatoes is a white sauce, so if you need to make them gluten-free, you have to have a substitute for the flour in the sauce.  This is a very yummy recipe that I served with breaded pork chops (homemade Shake and Bake equivalent) because, again, not exactly gluten-free inherently.

Ingredients

  • 2 pounds of potatoes (6 medium)
  • 1 small white or yellow onion
  • 2 tbsps olive oil
  • 2 tbsps butter
  • 1 tbsp GF flour (for this you want something substantial, like a fava bean flour, not a featherlight type).
  • 3/4 tsp salt
  • 1/2 tsp fresh grated pepper
  • 2 cups milk
  • 2 cups shredded sharp cheddar cheese (8 oz)
  • 1/4 gf bread crumbs (I use Aleias)
  • paprika

Instructions

For the potatoes, chop the onion very fine.  You want between 1/4 to 1/2 a cup depending on your preference. Without any onion, the potatoes will be quite bland.

Melt the butter and mix with the olive oil,

Cook the onion on low heat until it starts to soften and become translucent (but not brown).  Stir in the flour to make a bit of a paste, then add the milk and stir until fairly smooth.  Add the cheese and raise the heat, stirring constantly until the mixture boils and starts to thicken, about a minute after boiling.  Stir in the salt and pepper.   (If it doesn’t seem like it’s thickening you can add about a tsp of cornstarch mixed with a tiny bit of warm water, but you shouldn’t need to.

If the potatoes have a good skin, leave it on (because that’s where the nutrients are!) Otherwise peel them, and slice thin – 1/4 inch)(you’re aiming at about 4 cups). If the potatoes are large, you may need to cut them in half again.

Grease or spray a casserole dish (1 1/2-quarts), place in the potatoes and pour the sauce over them. Mix a bit. Top with breadcrumbs and remaining cheese and sprinkle with paprika to taste.

Cook uncovered in a 375 oven for 75 minutes(If you are roasting something at a lower temperature, you can just cook them longer – 100 minutes in a 325 oven, for example). Alternatively, you can cook them for about an hour and then add the crumbs and cheese, and cook for another 15-20 minutes, but I think that’s unnecessarily complicated. Throw them in and forget them. Either way, they’re pretty hard to mess up. They should be bubbly and brown at the edges when they are done.  Check the tenderness of the potatoes with a fork, if you’re not sure.

I served with breaded pork chops (GF, of course), applesauce and carrots.

Gluten-Free Au gratin potatoes with pork chop

Gluten-Free Breaded Pork Chops

TGluten-Free Au gratin potatoes with pork chophis is a very yummy recipe that I served with au gratin potatoes.

I know I know, processed food is bad.  But frankly, I adore Shake & Bake (both the taste and its ease).  And I love pork chops. However, as of yet, General Mills is not making a GF Shake & Bake, and I miss it. I find this be a pretty close substitute, using gluten-free flour and bread crumbs.

Pork Coating Mix

  • 2 tbsps yellow cornmeal
  • 2 tbsps GF Flour (a mediumly heavy mix, probably a brown rice and bean – I used Fava bean flour)
  • 2 tbsps GF Breadcrumbs, Italian style if possible. I use Aleias.
  • 1 tsp poultry seasoning (or sage)
  • 3/4 tsp salt
  • 1/2 tsp onion powder
  • 1/2 tsp Italian seasoning
  • 1/2 tsp paprika
  • 1/4 tsp sugar
  • 1/4 tsp pepper

Mix together all the dry ingredients in a bowl or, ideally, shake around in a plastic bag big enough to hold a pork chop.

You will also need 2 large pork chops and 1/4 cup milk

Cooking Directions

Rinse the pork chops in water and pat dry with a paper towel.  Then dip them in milk. You want all the sides to be coated. Don’t let them drip off too much – you want them to be wet. Drop them in the bag with the coating mixture and shake.  (You can just roll them around on a plate with the coating mixture, but shaking’s way easier and less messy).

Place on a shallow baking or roasting pan, and cook in a 425 degree F oven for 30 minutes or until the juices run clear and the center is opaque (165 degrees F (75C)). I find pork chops to be a little tricky – they seem to go from not cooked to overdone in about 1 minute and a half, so keep an eye on them and use a meat thermometer.

I served with au gratin potatoes, applesauce and carrots.

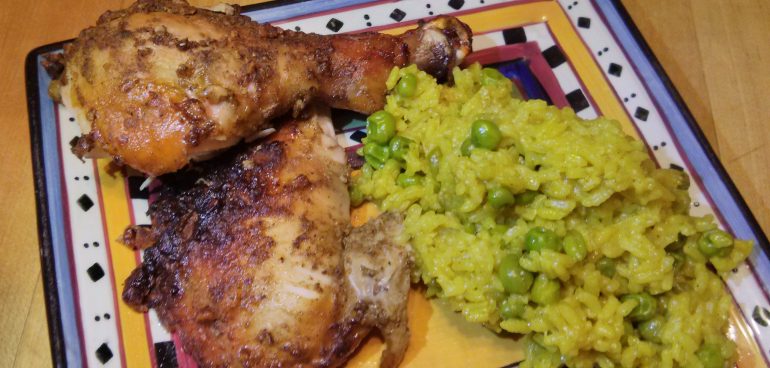
Vegetable Pallao and Cumin Cashew Chicken

Pullao Rice with Peas

I was looking for an accompaniment to Cumin and Cashew Chicken, and pulled this from my trusty Curries without Worries cookbook by Sudha Koul. (Out of print,Vegetable Pallao and Cumin Cashew Chicken but you can get it used.)  She introduces basic Indian cooking for not so savvy Americans (which I definitely was when I bought it over 20 years ago).  It did call for a lot of spices, many of which I didn’t have on hand. In the interest of speed and the contents of my spice rack, I adapted a number of ingredients to use ground rather than whole spices (cinnamon, cumin, the ginger, etc.)
Ingredients

  • 1 small to medium onion, finely chopped
  • 2 tbsps olive
    oil
  • 2 tbsps butter or ghee
  • 1/2 tsp ground ginger or 1 tsp fresh finely chopped ginger
  • 1/2 tsp ground turmeric
  • 1/2 tsp cinnamon (or a cinnamon stick)
  • 1/2 tsp ground cumin or cumin seeds
  • 1/4 tsp ground cloves or you can use 3 whole cloves
  • 1/4 tsp cardamon or 2 cardamon pods, crushed
  • 12 ounces peas (I used frozen).  You can also add another cup or so of veggies like cauliflower or potato. They should be crunchy and cut fairly small.  All I had on hand was peas, so that’s all I used this time.
  • 1 cup basmati rice
  • 1 cup chicken stock (if you want vegetarian than just use water)
  • 1 1/2 cups water
  • You can also add a pinch of saffron, soaked in 5 tbsps of water.

Instructions

Heat the oil and butter in a heavy saucepan on high for a minute until melted, then add the onion, ginger and turmeric and fry for another minute, stirring constantly.  Add the remaining spices except the salt, stirring them into the mixture for a few seconds. Add your vegetables and stir fry for 2 minutes. Add the dry rice and stir fry again for a few moments to really mix the spices onto the rice.

Add the stock, water and salt to the mixture and stir until boiling. Reduce the heat to low, add the saffron  if you have it, cover and cook for 15 minutes. The vegetables will start to float but don’t stir unless absolutely necessary as it breaks the rice grains and makes them lumpy. (which is why you want a heavier pot and low heat). Toss with a fork just before serving. Taste and add any additional salt to taste.

I served it with Cumin and Cashew Chicken. Hubby loved it.  Thumbs up.

White White and Sherry Pasta Sauce

White Wine & Sherry Pasta Sauce

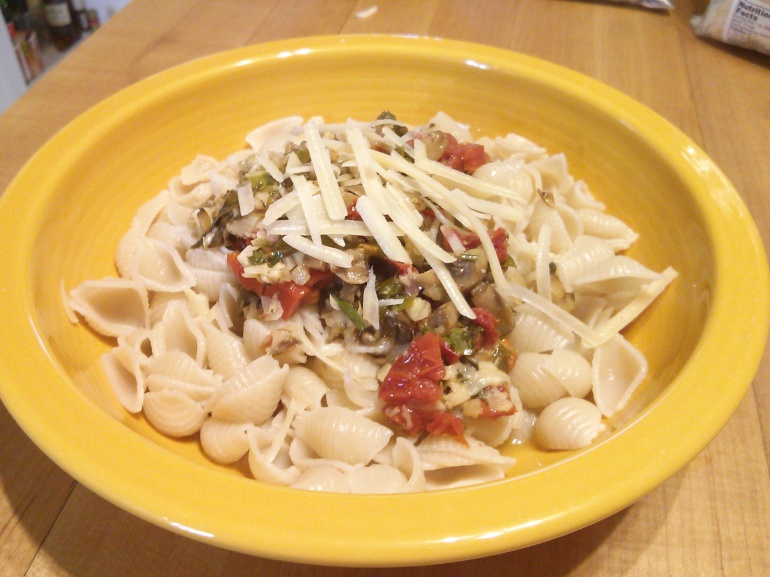
White White and Sherry Pasta SauceI often make a quick pasta sauce by throwing together shallots, garlic, a few spices and some white wine. I use fresh herbs when I can, but often use dried as well.  It usually cooks for only as long as it takes to boil the water and cook the pasta. Other ingredients go in as I have time, inclination or can find in the fridge.  This typically includes things such as sun-dried tomatoes, mushrooms and chopped spinach. (I’m a stealth vegetable eater.  I don’t like many vegetables so I try to sneak them into sauces and such to up my intake.)  This version include fresh herbs from the garden, mushrooms and tomatoes, as well as the addition of sherry.  I sometimes add diced chicken and sub chicken stock for the white wine. This makes enough for one or two.

Ingredients

  • 1/2-1 shallot or (or 2 tsps dried)
  • 3-4 cloves garlic
  • 1-2 tbsp olive oil
  • 3-5 sun-dried tomatoes
  • 3-4 small button or baby bella mushrooms
  • 1/4 cup dry sherry
  • 1/2 cup white wine
  • Herbs (I used fresh oregano, basil and rosemary, about 1 tablespoon each of chopped oregano and basil and a spring of rosemary).  If you are using dried, frankly I usually eyeball it.  4-5 good shakes of Italian herbs, plus an extra shake or two of basil, oregano and rosemary).
  • 2-3 tbsps butter
  • 1-2 tbsps Parmesan cheese (to mix in; you’ll want extra to top the sauce when it’s done).
  • 1/2-1 c  pasta per serving (Hubby eats gluten-free – his favorite is Tinkyada – the shells are pictured above. I go with regular since it’s so much cheaper than GF pasta and we eat a lot of pasta).

Instructions

Cook the pasta according to directions.

While the pasta is cooking (start when you put the water on), peel and finely chop the garlic and onion. Saute them in olive oil on low heat.  Dice and add the sun-dried tomatoes and mushrooms).  If you are using dried herbs, add them now. Cook, stirring occasionally until the shallot is translucent, and the mushrooms have browned.

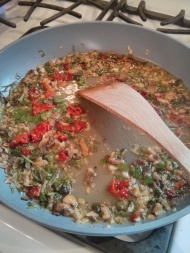
Sauce after sauteing the base and adding wine and sherry

Adding butter to the reduced sauce

Add the wine and sherry and simmer to reduce and burn off the alcohol.

If you are adding spinach or fresh herbs, add them once the sauce is reduced a bit. (Otherwise they lose a lot of their color). It will generally cook down to the right level in the time it takes to boil water and cook pasta. If you get distracted and it gets a bit dry, just add some more wine or sherry.

Just before serving, add 2-3 pats of butter and stir to melt in. This thickens the sauce (without gluten!).  Once the butter is melted, add the Parmesan cheese and do the same thing. You can add a bit more butter if it seems too thin.

Serve over pasta, with additional Parmesan as a garnish.

Glass of Red Wine on the counterEnjoy!  (The joy of using the sherry is that it gives the sauce a deeper flavor and you can go with either red or white wine depending on your mood.)

What will you try adding?

Canyon Bakehouse Hamburger Buns

Canyon Bakehouse Hamburger Buns Review

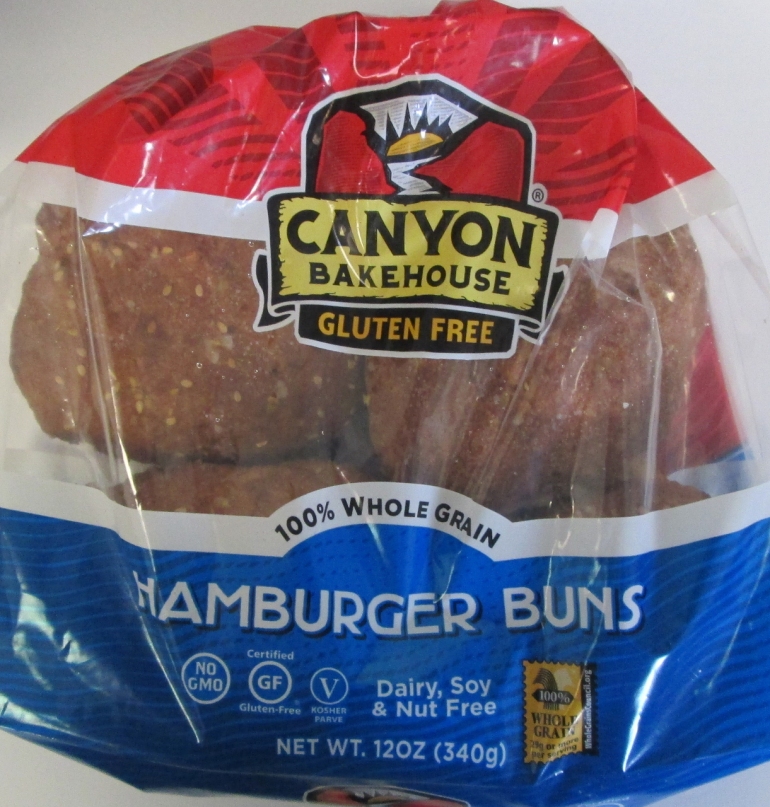
Canyon Bakehouse Hamburger BunsCanyon Bakehouse Gluten Free Hamburger Buns are a new product at one of my local grocery stores (Stop&Shop/Giant).  You can also buy them direct from Canyon.  Hubby is a big fan of the taste and texture of these over a bunch of other buns we have tried. They are light-brown, unsurprising given that Brown Rice Flour is the top ingredient (also features Tapioca, Sorghum, Millet and Potato), have a texture close to that of wheat bread, and more taste than a lot of gluten-free products.

They are certified GF. They are also dairy, nut and soy free as well, if those are issues for you (but do contain eggs).

The only downside seems to be that they can get a bit squished in the freezing process (or more likely transfer), so it was hard to cut one or two of them and use them for an actual hamburger because the bottom was mangled up.  But a definite thumbs up. They are now a repeat buy.